HOWTO: Compile using Microsoft Visual C++
- From a Windows machine on the campus network, navigate to the
folder containing class software for Computer Science.
- Click on the icon for Microsoft Visual C++, Msdev:

- You should see a window like the following:

- To create a new C++ program, from the File menu, select "New...":

- Click the Files tab, and select the option for creating a C++ Source
File. In the text field to the right, type the name of the new file with
the extension .cpp:

- Type the C++ program in the newly created pane:

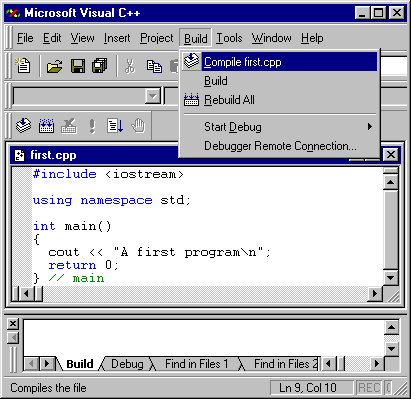
- To compile the program, from the Build menu, select the first
menu item. In this example, it shows that selecting the first
item will compile the source file first.cpp:

- Visual C++ uses project workspaces to organize a collection
of C++ source and object files. It is possible to create a project
workspace and add source files to it, but for simple programs, we
can use a default workspace that Visual C++ provides by clicking the
Yes button in the following dialog box:

- The compilation process will start, and the compiler will print
messages in the Build pane at the bottom of the window. Any warning
or error messages will appear here. If the program is syntactially
correct, you'll see a message indicating that there were no errors
and no warnings:

- After compiling the program, you can execute it. To do so, from
the Build menu, select the now active item "Execute first.exe":

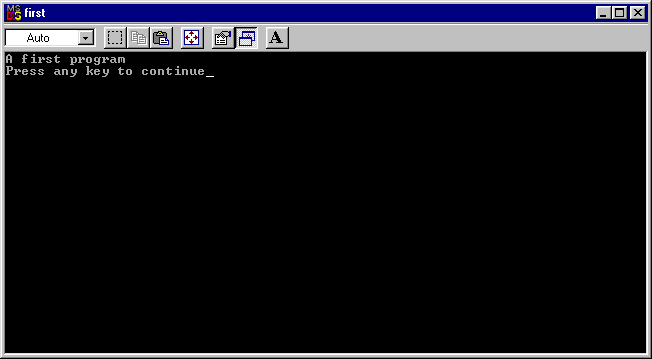
- This action will execute the program in a DOS window. After the
program executes, DOS will hold the screen until you press a key
to continue. You will then return to Visual C++.

- If you make further modifications to your program, you can select
the Execute option from the Build menu and Visual C++ will compile,
link, and execute in one step.


